|
 |
|
|
PREVIOUS
|
|
|
|
|
|
ANGLE GAGE BLOCK HEADER PAGE
|
|
|
|
Wringing Angle Gage Blocks & True Squares
|
|
|
Preparation of Angle Gage Blocks Prior to Wringing

Make sure that the blocks to be wrung are free from nicks and burrs.  It is important that all
 nicks and burrs be removed BEFORE attempting to wring blocks together because a burr on
 one block may damage the surface of the other block.

Blocks may be checked for burrs with a gage block stone before wringing.  A gage block stone
 with serrated grooves is recommended because it gives a better "feel" for nicks and burrs that
 catch the edges of the serrations.  Badly nicked surfaces will click as a nick passes along the
 serrations.
|
|
|
|
 |
|
|
|
Wringing Angle Gage Blocks
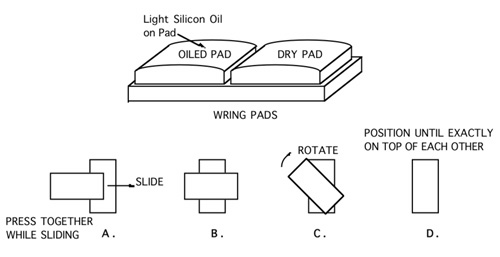
1. Make sure that blocks are clean.
2. Wipe the surfaces of the blocks to be wrung gently across the oiled Wring Pad.
(See figures below.)
3. Wipe these surfaces on the dry pad, removing as much oil as possible.
4. Slide the surfaces of the blocks together as shown. Apply pressure while sliding the blocks.
The blocks should slide together without any feel of bumps or scratching, and should adhere
to each other strongly after being rotated into place.
|
|
|
|
 |
|
|
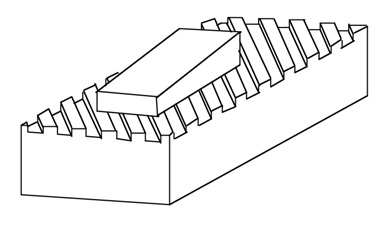
5. Push down the sides of the angle blocks on a surface plate to align the sides of the blocks.
If the sides are not even, measurement errors may be introduced. (See Errors in Measurement.)
|
|
|
|
 |
|
|
|
|
|
|
|
|
|
|
|
PREVIOUS
|
|
ANGLE GAGE BLOCK HEADER PAGE
|
|
|
AG25
|
|
©2018, Webber Gage Division, The L. S. Starrett Co, Westlake, Ohio , 44145
|
|
|
|
|
|
|
|
|
|
|
|
|
|
|
|
|
|
|
|
|
|
|
|
|
|
|
|